Follow Me On Social Media!


So you want to build a website. Maybe it’s a blog about your travels, a side hustle you’re launching, or just a place to show off your work. Whatever it is — WordPress is probably the best place to start, and I’m going to walk you through it like a friend who’s already been through the whole thing.
Fair warning: I’m going to keep this simple, skip the jargon, and maybe crack a joke or two along the way. Let’s go.
Table of Contents
- What Even Is WordPress?
- Why Is Everyone Using WordPress in 2026?
- WordPress.org vs WordPress.com — Yes, They’re Different
- Let’s Actually Build Your WordPress Site
- Quick FAQs
- Wrapping Up
What Even Is WordPress?
Okay, real talk — WordPress is just software that lets you build and run a website without knowing how to code. That’s it. No mysterious tech wizardry involved.
It powers over 44% of all websites on the internet. We’re talking everything from tiny personal blogs to massive news outlets and Fortune 500 company sites. So yeah, it’s kind of a big deal.
Two buzzwords you’ll hear thrown around:
- Open-source — basically means it’s free, and anyone in the world can tinker with it and make it better. Think of it like a community recipe that millions of chefs keep improving.
- Content Management System (CMS) — fancy way of saying “a tool that lets you add words, pictures, and pages to your website without touching a single line of code.”
Bottom line? WordPress makes building websites accessible to regular humans. You don’t need to be a developer. You just need some time and a willingness to click around.
Why Is Everyone Using WordPress in 2026?
WordPress has been around since 2003 — which in internet years is basically ancient. Two guys named Matt Mullenweg and Mike Little built it because they wanted better blogging software, and honestly… it snowballed from there.
Two decades later, it’s still the king. Here’s why people keep choosing it:
- You don’t need to code — seriously, not a single line. Point, click, done.
- Thousands of themes — you can completely change how your site looks in about 30 seconds.
- 59,000+ plugins — think of these as apps for your website. Want a contact form? Plugin. Online store? Plugin. Countdown timer? You guessed it — plugin.
- Massive community — if you ever get stuck, there are millions of tutorials, forums, and helpful strangers on the internet who’ve already solved your exact problem.
- It grows with you — started as a hobby blog? Cool. Turned into a business with 100,000 monthly visitors? WordPress can handle that too.
- Google likes it — WordPress is built in a way that search engines love, which helps you show up in search results.
A big turning point came in 2005 when WordPress introduced its Theme System, making it easy for anyone to have a good-looking site without hiring a designer. That was kind of a game-changer.
WordPress.org vs WordPress.com — Yes, They’re Different
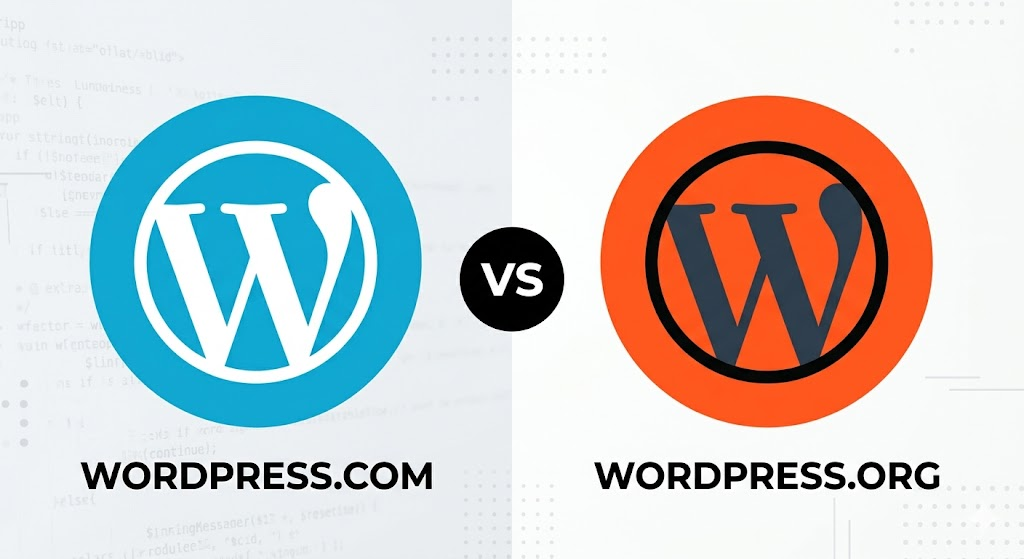
This one trips up a LOT of beginners, so let’s clear it up once and for all.
| Feature | WordPress.org | WordPress.com |
|---|---|---|
| Cost | Free software (you pay for hosting) | Free tier + paid plans |
| Hosting | You pick your own | It’s included |
| Customization | Total freedom | Limited on free plans |
| Plugins | All 59,000+ available | Restricted on lower plans |
| Best for | Bloggers, businesses, anyone serious | Hobby sites, total beginners |
WordPress.org — The “Real” One
This is what most people mean when they say “WordPress.” You download the free software and install it on your own web hosting. You’re in complete control — themes, plugins, monetization, all of it. It’s like owning your home versus renting a furnished apartment.
WordPress.com — The Easier (But More Limited) One
WordPress.com bundles everything together — hosting, software, domain — into one package. It’s simpler to get started, but you’re playing by their rules. The free plan especially has a lot of restrictions that can be frustrating if you want to grow.
My honest take? Go with WordPress.org (self-hosted). Yes, it takes a tiny bit more setup. But you’ll thank yourself later when you’re not bumping into walls trying to customize things. This guide is all about the self-hosted version.
Let’s Actually Build Your WordPress Site
Alright, enough background. Let’s get your hands dirty (not literally — please don’t put your hands in your computer).
Step 1: Getting WordPress Installed
First things first — before you can install WordPress, you need two things:
- A domain name (that’s your web address, like yoursite.com)
- A hosting plan (the server where your website actually lives)
A lot of hosting companies bundle these together, which is handy. For beginners, Bluehost is a solid pick — it’s affordable, beginner-friendly, and has a one-click WordPress installer that makes setup almost embarrassingly easy.
Getting Set Up on Bluehost:
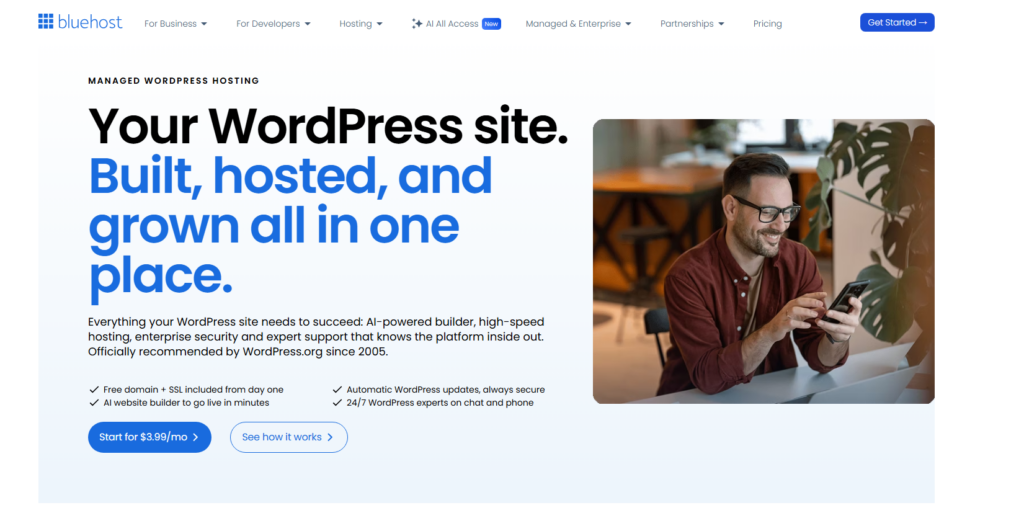
- Head to the Bluehost homepage and hit “Get Started”
- Pick a plan — the Basic plan is totally fine when you’re just starting out
- Enter your domain name
- Check out and confirm your account via email
Once that’s done, installing WordPress looks like this:
- Log in to your Bluehost cPanel
- Find the Website section and click “Install WordPress”
- Hit Install
- Choose which domain to install it on
- Optionally tweak your admin username and password under “Advanced Options”
- Accept the agreements and click “Install Now”
- Wait a couple of minutes… and boom — you have a website!
Quick note on the “one-click install” name: It’s definitely more than one click, but it’s still super easy. Think of it like “it only takes a minute” — technically a lie, but the spirit is right.
Step 2: Finding Your Way Around the Dashboard
Once WordPress is installed, log in by going to yourdomain.com/wp-admin. Welcome to the WordPress Dashboard — this is basically your website’s control room.
It’s got three main zones:
- Left-side menu — everything lives here. Posts, Pages, Plugins, Settings, the works.
- Top toolbar — quick stuff like previewing your site or logging out
- Center panel — your main workspace, changes depending on what you click
Here’s a quick tour of the important bits:
Dashboard Home — the welcome screen. Has little widgets that show you how many posts and pages you have, recent comments, and WordPress news. Nothing scary here.
Posts — this is where your blog lives. You can write new posts, manage old ones, and organize everything with categories and tags.
Pages — for the “static” stuff that doesn’t change much, like your About page or Contact page. These are different from blog posts — they don’t show up in your blog feed.
Media — your image and video library. Pro tip: keep this organized from day one. Future you will be grateful.
Comments — where readers chat with you. You can approve comments, reply, or delete the inevitable spam telling you you’ve “won a prize.”
Appearance — this is where your site gets its look. Themes, menus, widgets, colors — all here.
Plugins — install, activate, or get rid of plugins. More on these in a sec.
Users — manage who can access your site. WordPress has five user types, from the all-powerful Administrator (that’s you) to a Subscriber who can just read and comment.
Tools — import/export content, check your site’s health, manage privacy stuff.
Settings — the nitty-gritty configuration options: your site name, homepage setup, URL structure, and more.
Do this first! Go to Settings > Permalinks and switch to “Post name.” It makes your URLs look clean and readable (like
/my-awesome-post/instead of/?p=123). It’s also much better for SEO. You’re welcome.
Step 3: Picking a Theme (Your Site’s Wardrobe)
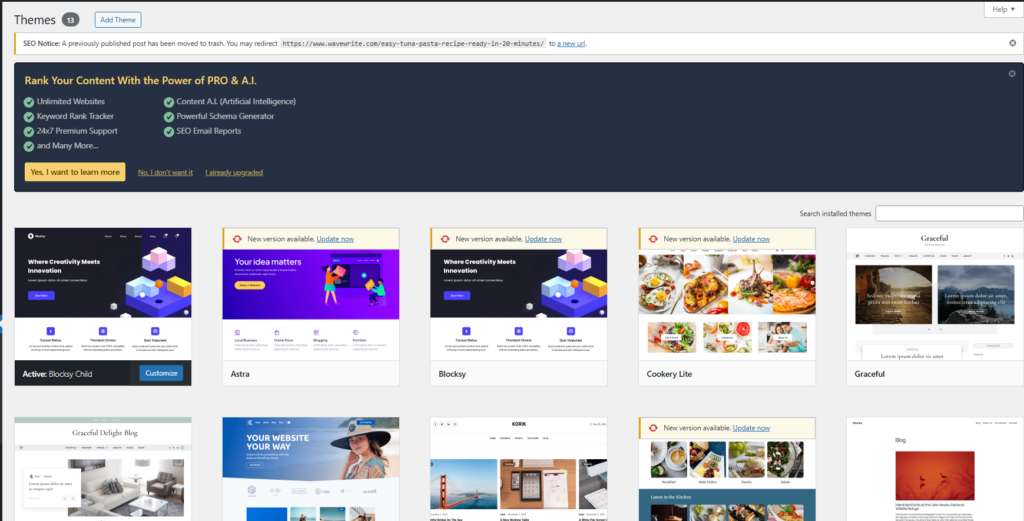
A WordPress theme is basically your site’s outfit. It controls how everything looks — the colors, the fonts, the layout, the header, the footer, all of it. And just like with actual clothes, there are endless options ranging from “free stuff from the thrift store” to “designer label.”
Premium themes (the paid ones) generally come with better support, more features, and regular updates. Free themes can be great too, but some are abandoned by their developers faster than a New Year’s resolution.
Before You Start Theme Shopping, Ask Yourself:
- What kind of site am I building? (Blog? Portfolio? Online shop?)
- Does it need to look great on phones? (Yes. Always yes.)
- What features do I actually need vs. what would just be nice to have?
Your Theme Checklist:
- ✅ Works on mobile (non-negotiable in 2026)
- ✅ Loads fast
- ✅ Plays nicely with popular plugins
- ✅ Gets regular updates from the developer
- ✅ Has good reviews
- ✅ Has a live preview so you can see it before committing
Installing a Free Theme (Straight from WordPress):
- Go to Appearance > Themes > Add New
- Search by name or browse Featured, Popular, and Latest
- Hover over one you like and hit Preview
- Click Install, then Activate — done!
Installing a Premium Theme You Bought Elsewhere:
- Download the
.zipfile from wherever you bought it - Go to Appearance > Themes > Add New > Upload Theme
- Select your
.zipfile and click Install Now - Hit Activate and you’re good to go
Real talk: Don’t spend three weeks agonizing over the perfect theme. Pick something clean, activate it, and start building. You can always switch later — and your content won’t disappear when you do.
Step 4: Installing Plugins (The Fun Part)
Plugins are honestly one of the best things about WordPress. They’re like apps for your website — little add-ons that give your site new powers without you having to write any code.
Want a contact form? Plugin. Want your site to show up better in Google? Plugin. Want to sell products? Plugin. Want a pop-up that greets visitors? Plugin (though maybe think twice about that last one — people are not huge fans of pop-ups).
There are over 59,000 free plugins in the WordPress library, plus thousands of premium ones. It’s a bit like having 59,000 toppings at an ice cream shop — overwhelming, but exciting.
The Must-Have Plugins for Beginners:
| What You Need | Go-To Plugin |
|---|---|
| SEO help | Yoast SEO or Rank Math |
| Security | Wordfence or Sucuri |
| Speed boost | WP Rocket or W3 Total Cache |
| Backups | UpdraftPlus |
| Contact forms | WPForms or Contact Form 7 |
| Online store | WooCommerce |
| Image compression | Smush |
One Important Heads-Up About Plugins:
Don’t go plugin-crazy. I know it’s tempting when everything sounds useful, but too many plugins can slow your site down and create security gaps. Only install what you actually need, and every now and then do a clean-up of plugins you’ve stopped using.
Installing a Free Plugin:
- Go to Plugins > Add New
- Search for the plugin by name or function
- Click Install Now, then Activate — that’s literally it
Installing a Premium Plugin:
- Buy and download the plugin
.zipfile - Go to Plugins > Add New > Upload Plugin
- Select the file, hit Install Now, then Activate Plugin
Step 5: Writing and Publishing Content
Here’s the part you’ve actually been waiting for — putting stuff on your site!
WordPress has two types of content:
- Pages — your permanent, “always there” stuff: homepage, About, Contact, Services
- Posts — your blog content: articles, tutorials, stories, updates
To Add a New Page:
- Log into your dashboard
- Click Pages > Add New
- Type your page title and add your content
- Hit Publish — it’s live!
To Write a New Blog Post:
- Log into your dashboard
- Click Posts > Add New
- Add your title, write your content, pick a category and some tags
- Hit Publish — boom, you’re a blogger now!
Let’s Talk About the Gutenberg Editor
Back in 2018, WordPress swapped out its old text editor for something called Gutenberg — a block-based editor where everything (paragraphs, images, headings, buttons, videos) is its own moveable “block.”
When it launched, people were not thrilled (2,000+ one-star reviews, yikes). But it’s genuinely improved a lot since then, and by 2026 it’s actually pretty great to use. It’s drag-and-drop, visual, and way more flexible than the old way of doing things.
The idea is simple: want to add an image? There’s a block for that. A heading? Block. A YouTube video? Block. You just click the “+” button, choose your block type, and add it wherever you want on the page.
Want even more control? Check out page builder plugins like Elementor or Beaver Builder. They sit on top of Gutenberg and give you insane drag-and-drop flexibility. Great for designing custom layouts without touching code.
Step 6: The Finishing Touches
You’ve got WordPress installed, a theme activated, some plugins running, and your first content published. Look at you go! Now let’s handle a few final things that’ll make your site safer, faster, and more professional.
Security — Don’t Skip This
WordPress is the most popular CMS on the planet, which unfortunately also makes it a popular target for hackers. Here’s how to lock things down:
- Update everything regularly — WordPress core, themes, plugins. Updates patch security holes.
- Use a strong password — not “password123.” Please. Use something complex and unique.
- Install a security plugin — Wordfence or Sucuri are both solid picks.
- Enable SSL/HTTPS — most hosts include this free. It’s the padlock in the browser bar, and Google actually ranks secure sites higher.
- Back up your site — more on this in a sec, but seriously, do it.
Maybe this Article can help you : Why Use Cloudflare Pages for WordPress? – WaveWrite
Speed — Because Slow Sites Lose Visitors
Nobody waits for a slow website anymore. If your site takes more than 3 seconds to load, people bounce. Here’s how to keep things snappy:
- Use a lightweight, clean theme (avoid bloated ones with a million features you don’t use)
- Install a caching plugin like WP Rocket
- Compress your images before uploading (or use the Smush plugin to do it automatically)
- Keep your plugin list lean — every active plugin adds a tiny bit of load time
Settings Worth Tweaking
- General Settings — add your site title and tagline. These show up in search results, so make them count.
- Writing Settings — set a default post category. “Uncategorized” is not a vibe.
- Permalink Settings — set to “Post name” if you haven’t already. Clean URLs for the win.
Your Logo
Even a simple logo makes your site look way more legit. Tools like Canva or Looka are free and can get you something decent in under 10 minutes. Once you have it, just go to Appearance > Customize > Site Identity > Add Logo and upload it.
SSL Certificate
That little padlock icon in the browser? That’s your SSL certificate at work. It encrypts the connection between your site and your visitors. Google recommends it, and it’s a ranking factor. The good news: most hosting plans (Bluehost included) give you one for free. Just activate it in your hosting control panel and make sure your WordPress address starts with https:// in Settings > General.
Backups — Your Safety Net
At some point, something will go wrong. A plugin update breaks your site, someone hacks in, or you accidentally delete something important. (It happens to everyone.) That’s why you need backups.
UpdraftPlus is the go-to free backup plugin. Set it to back up automatically to Google Drive or Dropbox, and you’ll be able to restore your entire site with a single click if disaster strikes. It’s the digital equivalent of saving your work — don’t skip it.
Quick FAQs
Is WordPress actually free? The software itself? Totally free. You’ll pay for hosting (around $3–15/month) and a domain name (about $10–15/year). Premium themes and plugins are optional extras.
Do I need to know how to code? Nope! Not even a little. The whole point of WordPress is that you don’t need to. If you ever want to get fancy with customizations down the road, a little HTML/CSS knowledge helps — but it’s absolutely not required to get started.
How’s WordPress different from Wix or Squarespace? WordPress gives you way more flexibility and control. You own everything. With Wix or Squarespace, you’re renting space on their platform and playing by their rules. Both are fine for super simple sites, but WordPress wins for anything you’re serious about growing.
Which hosting should I use? Bluehost, SiteGround, and Hostinger are all great starting points for beginners. Affordable, reliable, and they all make WordPress installation easy.
How do I keep my site secure? Keep everything updated, use a strong password, install a security plugin, activate SSL, and set up regular backups. And don’t install sketchy themes or plugins from random websites.
Can I change my theme later without losing my content? Yes! Your posts and pages live in the database, not in the theme. Switching themes just changes how things look — your content stays safe. Just always preview a new theme before activating it on your live site.
Wrapping Up
And that’s it — you now know how to use WordPress! Honestly, it’s not as scary as it sounds. It’s just a tool, and like any tool, it gets easier the more you use it.
You’ve got the basics down: what WordPress is, how to install it, how to navigate the dashboard, how to make it look good, how to add content, and how to keep it secure and fast. That’s genuinely everything you need to get started.
Now the only thing left to do is actually start. Seriously — close this tab, open your dashboard, and start building. You’re going to mess things up sometimes (we all do), but that’s how you learn. The WordPress community is massive and incredibly helpful, so answers are always just a quick search away.
Bookmark this guide for when you need a refresher, and remember — every expert WordPress user was once exactly where you are right now. You’ve got this. 🚀
Got questions? Drop them in the comments — I’d love to help you out!