
Follow Me On Social Media!




If you’ve been running a website for any amount of time, chances are you’ve heard someone say, “You really should link your domain with Cloudflare.” And if you’re like most people, you probably nodded along while quietly thinking, “What does that even mean?”
Don’t worry — I’ve been there too. But once I actually set it up? Total game changer. We’re talking faster load times, free SSL, serious protection from hackers, and even a boost in SEO. And the best part? It’s free, beginner-friendly, and takes less than 30 minutes.
So let’s break it all down in plain English — no confusing jargon, no fluff — just everything you need to know about why (and how) to link your domain with Cloudflare.
Table of Contents
What Is Cloudflare and How Does It Work?
Before we get into the “why,” let’s do a quick intro. Cloudflare is basically a superhero layer that sits between your website and the rest of the internet. It’s a global platform that combines a Content Delivery Network (CDN), DNS management, and a powerful security firewall — all rolled into one.
Here’s the simplified version of how it works:
- CDN (Content Delivery Network): Instead of your site loading from one single server (say, somewhere in Germany), Cloudflare copies your content and stores it across hundreds of servers worldwide. So if someone in Morocco visits your site, they’re loading it from the nearest server — not halfway across the planet. That means way faster load times.
- DNS Management: When you link your domain with Cloudflare, it also handles your domain’s DNS (Domain Name System). Think of DNS as the internet’s phone book — it points your domain name to the right server. Cloudflare’s DNS is one of the fastest in the world.
- Security Layer: Cloudflare sits in front of your site and filters incoming traffic. Malicious bots, hackers, and attackers have to get past Cloudflare before they even reach your server. Spoiler: most of them don’t make it.
Pretty solid, right? Now let’s talk about why you should actually link your domain with Cloudflare.
Why You Should Link Your Domain with Cloudflare
Honestly, the better question is: why wouldn’t you? Here are the big reasons.
1. Improved Website Speed (CDN Benefits)
Nobody likes a slow website. Studies show that if your page takes more than 3 seconds to load, a huge chunk of your visitors will just… leave. Bye.
When you link your domain with Cloudflare, their global CDN kicks in and serves your content from whichever data center is geographically closest to your visitor. Whether they’re in New York, Tokyo, or Nairobi — they’re getting a fast experience.
Cloudflare also caches your static content (images, CSS, JS files) so your server doesn’t have to work as hard. Less load on your server = faster responses for everyone.
Actionable tip: After setting up Cloudflare, enable “Auto Minify” in your Cloudflare dashboard to strip unnecessary characters from your HTML, CSS, and JavaScript — it shaves off precious milliseconds without you lifting a finger.
2. Free SSL Certificate
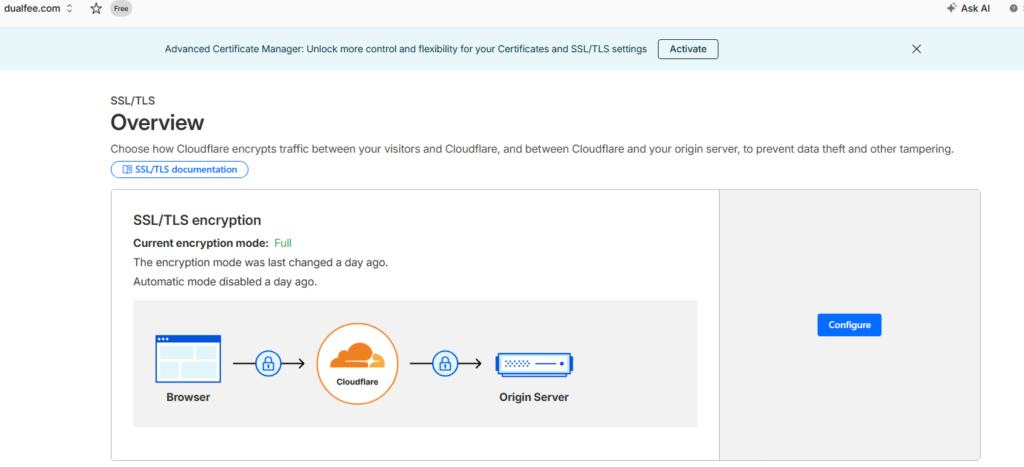
Back in the day, getting an SSL certificate (that little 🔒 padlock in your browser) cost real money. Not anymore.
When you link your domain with Cloudflare, you get a free SSL certificate automatically. This is massive because:
- Google uses HTTPS as a ranking signal
- Visitors trust sites with SSL more
- Many browsers now show scary “Not Secure” warnings on HTTP sites
If your site is still running on HTTP, linking your domain with Cloudflare is honestly one of the easiest fixes you can make today.
3. DDoS Protection
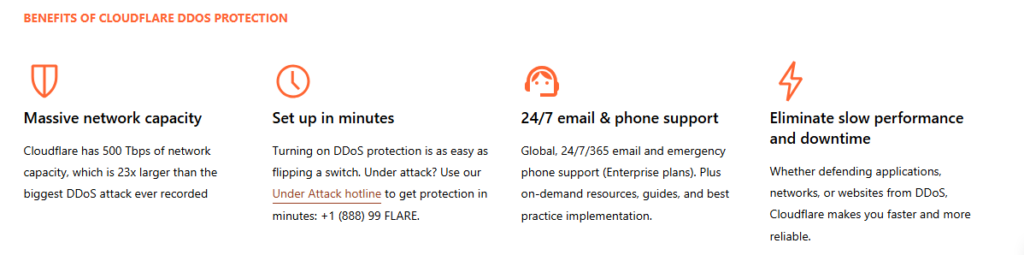
DDoS attacks (Distributed Denial of Service) are when malicious actors flood your server with fake traffic to crash your site. It’s the internet equivalent of someone hiring thousands of people to stand in your doorway so real customers can’t get in.
Cloudflare handles billions of threats per day and automatically blocks suspicious traffic patterns before they reach your server. Even on the free plan, you get solid DDoS mitigation. For most small-to-medium websites, it’s more than enough.
4. Better DNS Management
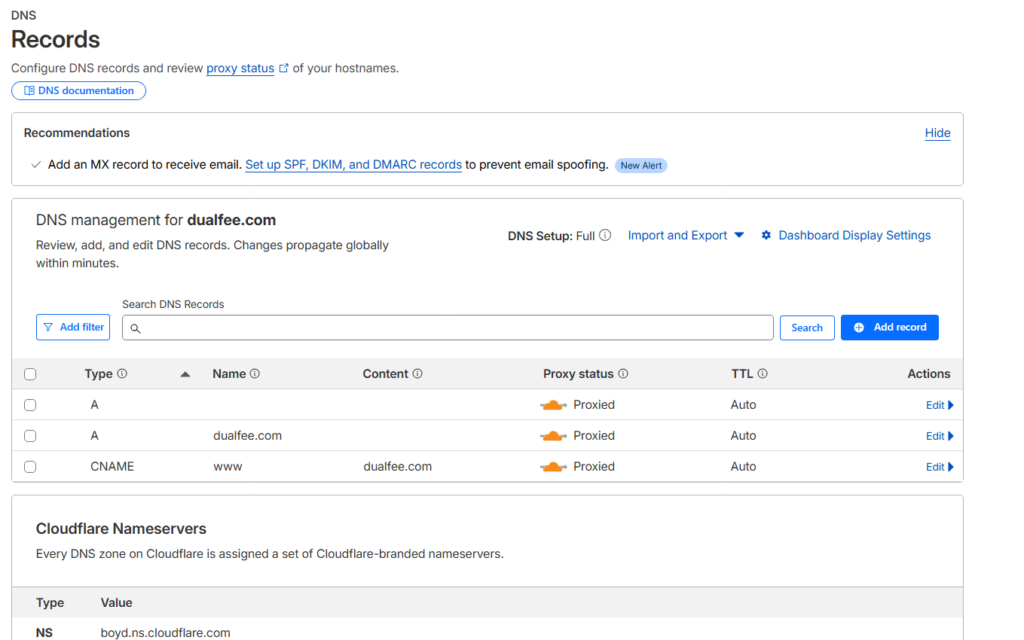
Cloudflare operates one of the world’s fastest DNS resolvers (1.1.1.1). When you link your domain with Cloudflare and move your DNS there, lookups happen faster — meaning the first step of someone visiting your site is already quicker.
You also get an incredibly clean, easy-to-use DNS management interface. Adding records, setting up subdomains, configuring email — it’s all much simpler than dealing with your hosting provider’s clunky DNS panel.
👉 If you’re not sure what DNS is, check out our guide: What Is DNS and How Does It Work?
5. SEO Performance Boost
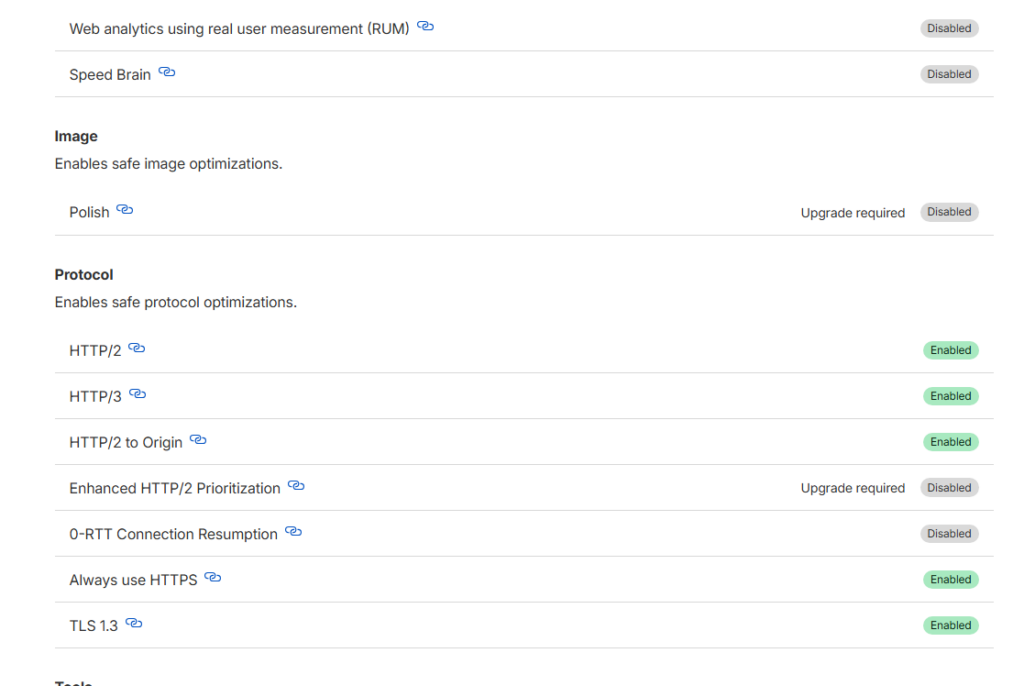
Here’s something a lot of people miss: when you link your domain with Cloudflare, it indirectly helps your SEO in several ways.
- Faster page speed → better Core Web Vitals scores → higher Google rankings
- Free SSL → HTTPS → ranking signal for Google
- Reduced downtime → your site stays accessible to Googlebot
- Better mobile performance → improved mobile UX signals
Google has been crystal clear: site speed and security matter for rankings. Cloudflare helps you nail both.
6. Protection Against Hackers & Bots
Web scraping bots, brute-force login attempts, spam bots — the internet is crawling with these things. Cloudflare’s Web Application Firewall (WAF) filters out this garbage traffic before it ever touches your website.
For WordPress sites especially, this is a big deal. WordPress is the most popular CMS in the world, which also makes it the most targeted. When you link your domain with Cloudflare, you add a robust security layer on top of whatever your hosting and plugins already do.
For more on keeping your site locked down, check out:
- 6 Best WordPress Security Plugins to Protect Your Site (2026)
- How to Secure a Domain Name: 9 Best Security Tips – SiteGround Academy
Is Cloudflare Safe for WordPress Websites?
100% yes — and it’s actually one of the most popular setups among WordPress site owners.
Cloudflare is compatible with virtually every WordPress hosting provider, including SiteGround, Bluehost, WP Engine, Cloudways, and more. Many of them even have Cloudflare integrations built right in.
A few things to be aware of:
- Caching: Cloudflare caches your pages, which is great for speed — but can sometimes serve outdated content. You can easily clear the cache from the Cloudflare dashboard whenever you make major updates.
- IP addresses: Since Cloudflare proxies your traffic, your server logs will show Cloudflare IPs instead of real visitor IPs. You can restore real IP logging with a small server tweak or a plugin like Cloudflare’s official WordPress plugin.
- Page Rules: The free plan gives you 3 page rules, which is usually plenty for most sites.
Bottom line: the benefits far outweigh the minor quirks, and the Cloudflare community is huge — help is always easy to find.
Step-by-Step: How to Link Your Domain with Cloudflare
Ready to get started? Here’s exactly how to link your domain with Cloudflare, even if you’ve never done anything like this before.
Step 1: Create a Free Cloudflare Account Go to cloudflare.com and sign up for free. Easy.
Step 2: Add Your Website Once logged in, click “Add a site” and type in your domain name (e.g., yourwebsite.com).
Step 3: Choose the Free Plan Select the free plan — it’s genuinely excellent for most websites. You can always upgrade later if you need more features.
Step 4: Cloudflare Scans Your DNS Records Cloudflare will automatically scan your existing DNS records. Review them and make sure they all look correct before moving on. This is important — if any records are missing, your email or other services might stop working.
Step 5: Update Your Nameservers Cloudflare will give you two custom nameservers (they’ll look something like ella.ns.cloudflare.com). You need to log into your domain registrar (GoDaddy, Namecheap, Google Domains, etc.) and replace your current nameservers with these two Cloudflare ones.
Step 6: Wait for Propagation DNS changes can take anywhere from a few minutes to 48 hours to propagate globally — though with Cloudflare it’s usually pretty quick. You’ll get an email from Cloudflare when it’s confirmed.
Step 7: Enable SSL and Tweak Settings Once active, go to the SSL/TLS section and set it to “Full” or “Full (Strict)” if your origin server already has a certificate. Turn on “Always Use HTTPS” too.
That’s it — you’ve successfully linked your domain with Cloudflare! 🎉
For deeper DNS guidance, Cloudflare’s official DNS documentation is genuinely one of the best resources out there.
Common Mistakes to Avoid
Even though the setup is pretty smooth, here are a few traps people fall into:
- Deleting DNS records during setup. Cloudflare scans your existing records, but double-check them. If you accidentally remove your MX records, your email will stop working.
- Setting SSL to “Flexible” when your server already has SSL. This can cause redirect loops. Use “Full” or “Full (Strict)” instead.
- Not clearing cache after major updates. If visitors are seeing old content, clear the Cloudflare cache from the dashboard.
- Forgetting to re-enable orange cloud (proxy) on DNS records. If the orange cloud icon is grey, Cloudflare isn’t proxying that record — meaning no CDN or security benefits for it.
- Ignoring firewall rules. Take 10 minutes to explore Cloudflare’s firewall settings. Even basic rules can block a surprising amount of bad traffic.
Who Should Use Cloudflare?
Honestly? Almost everyone with a website. But here’s a quick breakdown:
- Bloggers and content creators — free speed and SSL boost your SEO significantly
- E-commerce store owners — DDoS protection and uptime are critical when money is on the line
- WordPress site owners — great protection against bots, brute force attacks, and plugin vulnerabilities
- Developers and agencies — advanced DNS management, analytics, and Workers for custom logic
- Small businesses — free SSL and a professional, secure setup without expensive hosting
If you’re serious about your website’s performance and security, there’s really no good reason not to link your domain with Cloudflare.
Frequently Asked Questions (FAQ)
Q: Is Cloudflare really free? Yes! Cloudflare’s free plan is incredibly generous and includes CDN, SSL, DDoS protection, and DNS management. They do have paid plans (Pro, Business, Enterprise) with extra features, but for most websites, free is more than enough.
Q: Will linking my domain with Cloudflare affect my email? It shouldn’t — as long as you keep your MX records intact during setup. Cloudflare doesn’t proxy email by default; it only proxies web traffic (HTTP/HTTPS). Just double-check your MX and SPF records are present after migration.
Q: How long does it take to set up? The setup itself takes about 15–30 minutes. DNS propagation (changes going live worldwide) can take a few minutes to 48 hours, but it’s usually much faster — often under an hour.
Q: Can I use Cloudflare with any hosting provider? Yes. Cloudflare works with virtually any web host. It’s at the DNS level, so your hosting setup stays the same — Cloudflare just sits in front of it.
Q: Is Cloudflare safe? Should I trust it with my domain? Cloudflare is one of the largest and most trusted infrastructure companies in the world, protecting millions of websites including major corporations and government agencies. It’s referenced and recommended by security authorities like OWASP as a solid security layer. You’re in very good hands.
Conclusion: Go Ahead, Link Your Domain with Cloudflare
Look, there aren’t many things in the world of website management that are genuinely free, genuinely easy, and genuinely make a real difference. Cloudflare is one of them.
When you link your domain with Cloudflare, you get a faster website, a free SSL certificate, solid protection from hackers and bots, and an SEO edge — all without touching a single line of code. It takes less than 30 minutes and the results are immediate.
So if you’ve been sitting on the fence about this one, consider this your sign to just go do it. Your visitors will thank you, Google will thank you, and honestly, future-you will thank you when a bot attack gets silently blocked at 3am while you’re fast asleep.
Have questions or run into any issues during setup? Drop a comment below — happy to help!