
Follow Me On Social Media!



⚡ TL;DR — What You’re Getting (For Free. Forever.) Oracle Cloud’s Always Free tier hands you a 4 OCPU / 24 GB RAM ARM-based VM, 200 GB of storage, and a $0 monthly bill — permanently. No other big cloud comes close to this for free. Not even close.
Table of Contents
Why Oracle Cloud Is the Free VPS You’ve Been Sleeping On
You find a “free” cloud server, get excited, set everything up — and then 30 days later, boom, you’re getting billed. Sound familiar?
AWS gives you a free EC2 instance for 12 months, then starts charging. Google Cloud’s $300 credit disappears in 90 days like it was never there. Vultr and DigitalOcean? Free trials — not free forever.
Oracle Cloud is playing a completely different game. Their Always Free VM is legitimately free with no expiry date and no hidden gotcha waiting around the corner. I know, I was skeptical too. But it’s real.
Whether you’re a dev with a side project collecting dust, a student who needs a portfolio server, or just someone who wants to mess around with Linux without paying for it — this guide’s for you. I’ll take you from zero to a live web server without spending a single cent.
Here’s what we’re covering:
- What you actually get on the Always Free tier (spoiler: it’s a lot)
- How to sign up without accidentally getting charged
- SSH, ports, firewalls — all that fun stuff
- The one sneaky iptables issue that’ll make you want to flip your desk if you don’t know about it
Alright, let’s go.
1. Free Tier vs. Always Free — They’re Not the Same Thing
This confused me at first, so let me clear it up before anything else.
The 30-Day Trial Phase (The Honeymoon Period)
When you first sign up, Oracle throws $300 in credits at you, valid for 30 days. During this time you can spin up basically anything — Kubernetes clusters, managed databases, load balancers, the works. It’s Oracle basically saying “look how cool we are.” And honestly? It is pretty cool.
The Always Free Phase (The Part That Actually Matters)
Once your trial ends, your account flips to “Pay as You Go.” That phrase is terrifying, I know. But here’s the thing — a bunch of resources are permanently labeled “Always Free” and will literally never charge you, as long as you stay within the limits.
Here’s the good stuff you keep forever:
| Resource | What You Get |
|---|---|
| AMD Micro Instances | Up to 2 instances (1/8 OCPU, 1 GB RAM each) |
| ARM Ampere A1 | Up to 4 OCPUs + 24 GB RAM |
| Block Storage | 200 GB total |
| Object Storage | 10 GB |
| Outbound Data Transfer | 10 TB/month |
The star of the show is that ARM Ampere A1 instance — 4 OCPUs and 24 GB of RAM, free, forever. AWS’s free tier gives you 1 vCPU and 1 GB of RAM. Oracle is basically handing you a sports car while everyone else is offering a bicycle.
📌 Want all the boring-but-important details? Check out Oracle’s official Always Free page.
2. Signing Up Without Shooting Yourself in the Foot
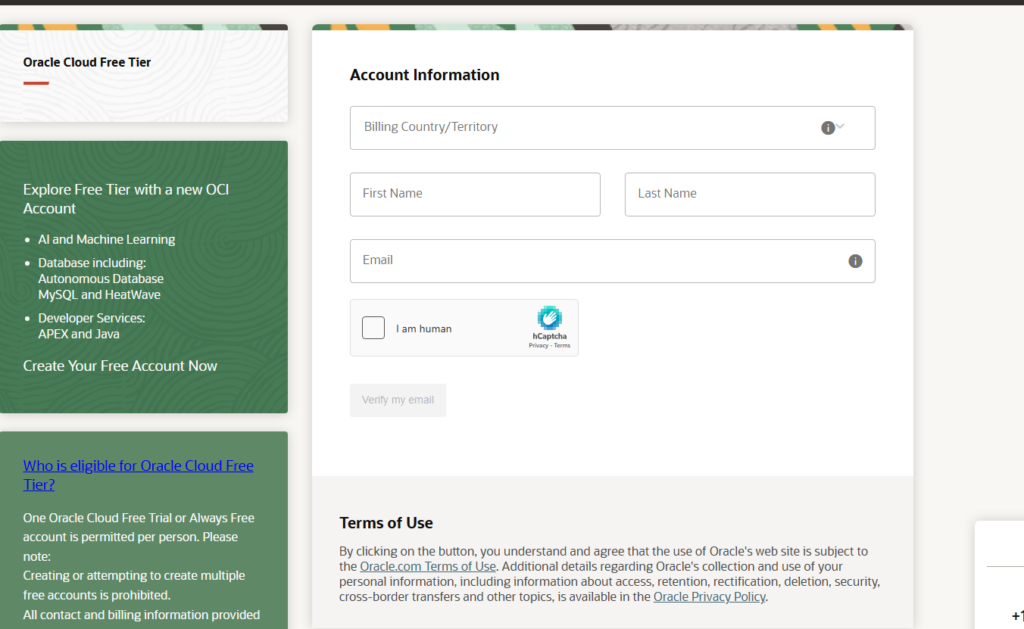
The sign-up process is mostly straightforward, but there are a couple of spots where things can go sideways. Here’s how to navigate them.
Pick Your Home Region Carefully (Like, Really Carefully)
Oracle will ask you to choose a Home Region during sign-up. This decision is permanent — you literally cannot change it later. So don’t just click whatever’s at the top of the list.
Pick something close to where your users are (or where you are, if this is just for personal use):
- US East (Ashburn) — Great for North America, and it tends to have the most available capacity
- Germany Central (Frankfurt) — Solid choice for Europe
- Japan East (Tokyo) — The go-to for Asia-Pacific
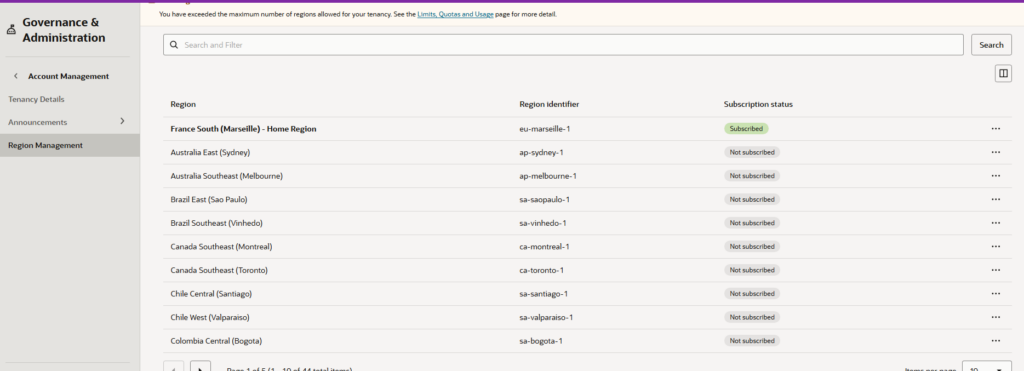
⚠️ Your Always Free resources are locked to your Home Region. Choose wisely and you’ll never have to think about it again. Choose poorly… and, well, you’ll be making a new account.
Yes, They Want Your Card. No, They Won’t Charge It.
I know, I know — “free tier that needs a credit card” sounds like the start of a horror story. But Oracle just does a $1 temporary hold to verify the card’s real. It gets refunded within a few days. You won’t be charged for anything as long as you stick to Always Free resources.
One heads-up: prepaid cards tend to fail this verification. Use a regular bank card and you’ll be fine.
Name Your Account Something You’ll Remember
You’ll create a Cloud Account Name (Oracle calls it a tenancy name) that shows up in your login URL. It can’t be changed later, so pick something sensible — your name, your project name, whatever. You’ll be typing it at https://cloud.oracle.com every time you log in.
3. Creating Your First Free VM — Don’t Panic, Just Follow Along
Head to Compute → Instances → Create Instance in your dashboard. Here’s how to set it up without accidentally signing up for a $200/month server.
Give It a Name
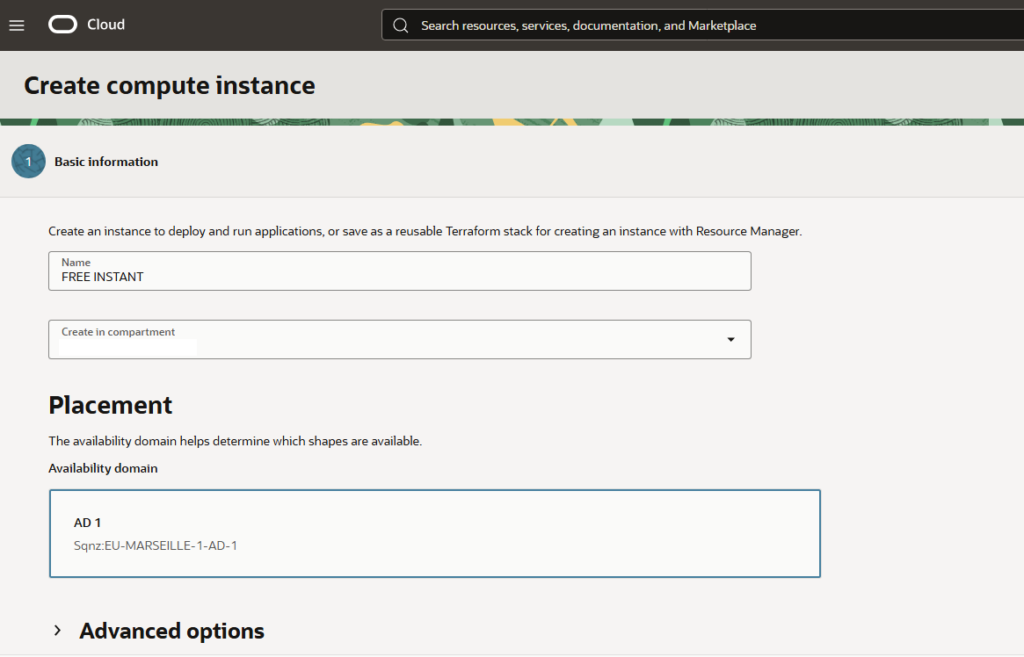
Nothing fancy — something like my-free-server works great. Pick the default compartment (root) and move on.
Choose Your OS
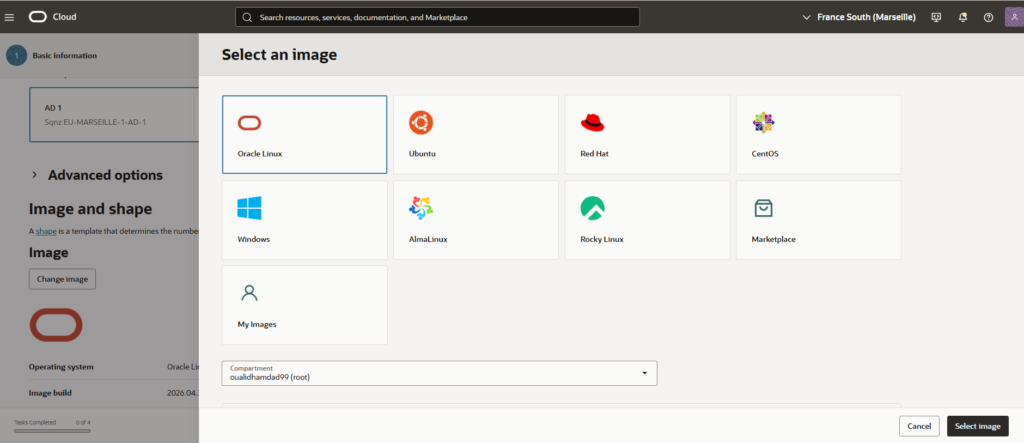
Click Edit in the Image and Shape section. Your options include:
- Oracle Linux 8/9 — Stable, enterprise-grade, great if you’re comfortable with RHEL-based systems
- Ubuntu 22.04 LTS — My recommendation. Tons of tutorials, huge community, very familiar if you’ve used Linux before
- CentOS Stream / Debian — Also available if that’s your thing
We’ll go with Ubuntu 22.04 LTS for this guide.
Choose Your Shape — This Is the Important Part
This is where beginners accidentally pick a paid tier and give themselves a bad day. Click Change Shape and hunt for the little “Always Free-eligible” badge — it’s a small gray label next to the free options.
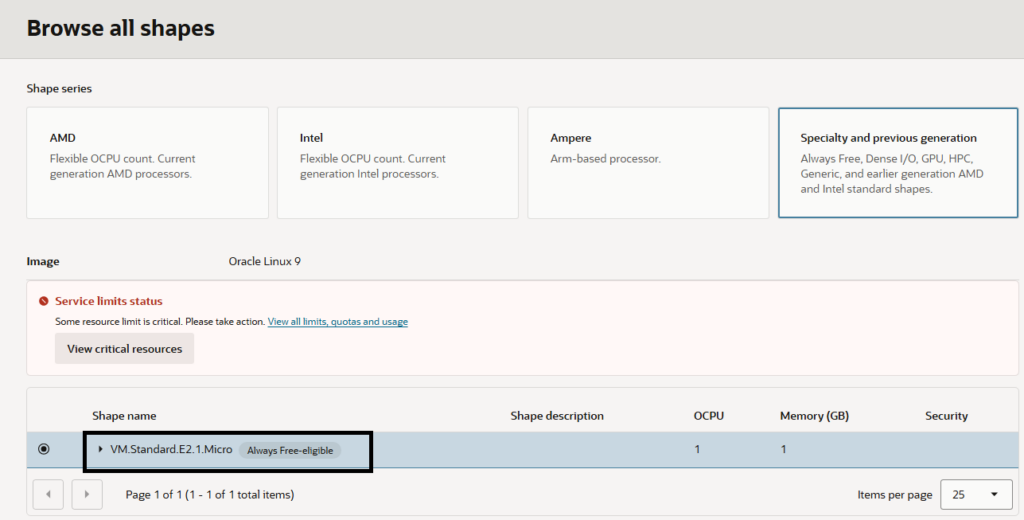
For the beefy ARM instance, select:
- Series: Ampere
- Shape: VM.Standard.A1.Flex
- OCPUs: 4 (max free)
- RAM: 24 GB (max free)
If you don’t see the “Always Free” label, stop and go back. Seriously. That badge is your safety net.
Set Up Your SSH Keys (Don’t Skip This, I’m Begging You)
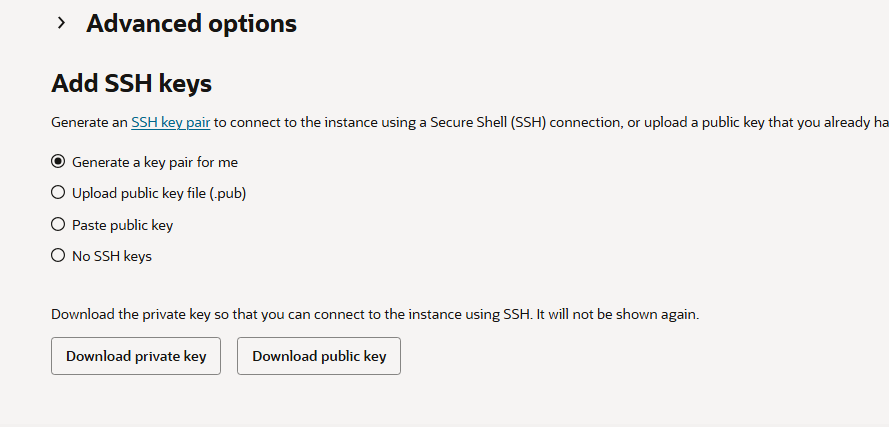
Here’s the thing about Oracle VMs — there’s no password login. SSH keys are literally the only way to get into your machine. If you lose your private key, you’re locked out forever. No support ticket will save you.
If you don’t have keys yet: select “Generate a key pair for me” and immediately download both files. Put the private key somewhere safe — like, treat it as carefully as you’d treat your passport.
If you already have keys: just paste your public key (usually at ~/.ssh/id_rsa.pub) into the box.
Hit Create and Wait
Oracle spins up your instance in about 1–3 minutes. When the status flips to “Running” and you see a public IP address, you’re ready to roll.
4. Opening Up Ports So the World Can Actually Reach Your Server
Your VM is running, but right now it’s basically a house with all the doors locked. Let’s fix that.
Finding Your Network Settings
Click the hamburger menu (the three little lines in the top-left corner), then go to Networking → Virtual Cloud Networks. Select your default VCN, then click Security Lists on the left.
Adding the Rules You Need
Click Add Ingress Rules and set these up:
Port 22 (SSH) — Check if it’s already there. It usually is. If not, add it with source CIDR 0.0.0.0/0 and TCP protocol.
Port 80 (HTTP) — Add a new rule:
- Source CIDR:
0.0.0.0/0 - Protocol: TCP
- Port:
80
Port 443 (HTTPS) — Same deal, just change the port to 443.
Save it. Changes kick in immediately, no waiting around.
5. Actually Getting Into Your VM
Alright, time to SSH in and feel like a hacker (in the cool way).
Fix Your Key Permissions First
SSH is weirdly paranoid about key file permissions (for good reason). Before you connect, run this:
chmod 400 /path/to/your-private-key.key
Skip this and you’ll get a “permissions are too open” error that’s more annoying than it sounds.
Connect!
ssh -i /path/to/your-private-key.key ubuntu@YOUR_PUBLIC_IP
If you went with Oracle Linux instead of Ubuntu, swap ubuntu for opc.
When you see the Ubuntu welcome message and a command prompt, you’re in. That’s your free server, right there.
Update Everything Before You Do Anything Else
Seriously, do this first:
sudo apt update && sudo apt upgrade -y
It’ll take a few minutes but it patches security holes in the base image. Think of it like putting on a seatbelt before you drive.
6. Let’s Set Up Nginx — and Fix the Thing Nobody Talks About
Time to actually do something with this server. Let’s get a web server running.
Install Nginx
sudo apt install nginx -y
Nginx starts automatically when installation finishes. Double-check it’s running with:
sudo systemctl status nginx
You want to see active (running). If you do, great — Nginx is alive.
The Moment of Truth (That Will Probably Fail at First)
Now go open http://YOUR_PUBLIC_IP in a browser. Expecting to see the Nginx welcome page?
Yeah, it’s going to time out. Don’t freak out — this is completely normal with Oracle Cloud and it’s not your fault.
Here’s what’s happening: Oracle Cloud has two separate firewall layers, and most guides only tell you about one of them.
- OCI Security Lists — the cloud-level firewall you just configured ✅
- OS-level iptables/UFW — a firewall running inside your VM that nobody warned you about 😅
You need to fix both. Here’s how.
Fix #1 — Turn on UFW
Check if it’s running:
sudo ufw status
If it’s inactive, enable it:
sudo ufw allow OpenSSH
sudo ufw allow 'Nginx Full'
sudo ufw enable
Fix #2 — The Secret Oracle iptables Thing
This is the one that trips everyone up. Oracle ships its VM images with an iptables rule that flat-out blocks all incoming traffic on ports 80 and 443 at the OS level — even after you’ve opened them in the Oracle dashboard. It’s like having a bouncer who didn’t get the guest list update.
Run this to clear it out:
sudo iptables -F INPUT
sudo iptables -F FORWARD
sudo iptables -F OUTPUT
Or if you want to be more surgical about it:
sudo iptables -D INPUT -j REJECT --reject-with icmp-host-prohibited
sudo iptables -D FORWARD -j REJECT --reject-with icmp-host-prohibited
Now try loading http://YOUR_PUBLIC_IP again. You should see the Nginx welcome page. That’s your server, live on the internet, running on a machine that costs you nothing. Pretty sweet.
💡 One more thing: those iptables rules reset every time you reboot. To make the fix stick permanently:
sudo apt install iptables-persistent -y
sudo netfilter-persistent save
📖 Want to go deeper on Linux firewalls? The Ubuntu UFW docs are actually pretty readable.
7. Making It Actually Yours
The default Nginx page is fine for a quick test, but let’s make it yours. Your server files live in /var/www/html/. Edit the main page like this:
sudo nano /var/www/html/index.html
Write whatever HTML you want, hit Ctrl+X → Y → Enter to save, and refresh your browser. Boom — your page, your server, zero dollars.
When you’re ready to go further, here are some fun next steps:
- Hook up a domain name — grab a free one or use a paid registrar, then point it at your IP
- Add HTTPS with Let’s Encrypt — just run
sudo apt install certbot python3-certbot-nginx -yand follow the prompts - Deploy a real app — Node.js, Python Flask, PHP, whatever you’re building — Nginx can proxy it all
8. Don’t Accidentally Blow Past Your Free Limits
You’re almost certainly not going to hit the limits, but just so you know:
| What’s Tracked | Monthly Limit |
|---|---|
| OCPU Hours | 3,000 hours |
| Memory GB Hours | 18,000 GB-hours |
Running one instance at 4 OCPUs 24/7 burns through about 2,928 OCPU hours a month — right under the cap. So you’re basically safe by default.
To peek at your usage, go to Billing & Cost Management → Usage in your dashboard. Filter by Compute and set it to the current month. Oracle will also email you if you’re getting close to limits, so make sure that email address is one you actually check.
Final Thoughts: This Is Genuinely One of the Best Deals on the Internet
I don’t say this lightly — the Oracle Cloud Always Free VM is one of the best things in tech that most people haven’t heard of. Four OCPUs, 24 GB RAM, 200 GB storage, running forever, for free. That’s a proper server, not some toy instance.
Yes, the setup has a couple of quirks (hi, iptables). But once you know what to do, you can go from zero to a live web server in under 30 minutes. After that, the possibilities are wide open — Docker, VPNs, reverse proxies, hobby apps, learning projects — all on your dime-free machine.
Honestly? Go sign up. Right now. What do you have to lose?
FAQ — The Questions You’re Probably Already Thinking
Is Oracle Cloud VM really free forever?
Yep, for real. The Always Free tier has been running since 2019 and Oracle has shown no signs of pulling it. Just make sure you pick the “Always Free-eligible” shape when creating your instance — that’s the key step.
What happens when my $300 trial credit runs out?
Your account switches to “Pay as You Go,” which sounds scary but isn’t. Your Always Free resources keep running at $0. You only get charged if you go out of your way to add paid stuff.
Can I run Ubuntu on Oracle Cloud for free?
100% yes. Ubuntu 22.04 LTS is right there in the image picker and fully covered under the Always Free tier. It’s what most people use and it’s what this guide is built around.
My Nginx server is running but I can’t load the page — help!
Classic Oracle moment. Run sudo iptables -F INPUT to flush those hidden blocking rules. Then install iptables-persistent so the fix survives a reboot. Nine times out of ten, that’s all it takes.
Can I run more than one free VM?
You can! Your 4 free OCPUs and 24 GB RAM can be split across multiple A1 instances however you like. You can also run two separate AMD micro instances on top of that. Just keep an eye on your monthly usage so you don’t accidentally drift into paid territory.
Do I really need a credit card just to get the free tier?
Unfortunately yes, but it’s painless. They just do a $1 hold to confirm the card’s legit, then release it. No charges unless you choose to go beyond the free stuff. Use a real bank card rather than a prepaid one — those sometimes don’t work for the verification.
Maybe Can help you
Why Are You Still Paying AWS Prices? The Best Value VPS Guide for 2026 – WaveWrite
Link Your Domain with Cloudflare: Why Every Website Owner Should Do It – WaveWrite